Posts

Showing posts from November, 2018

Preparing my final prints

Image
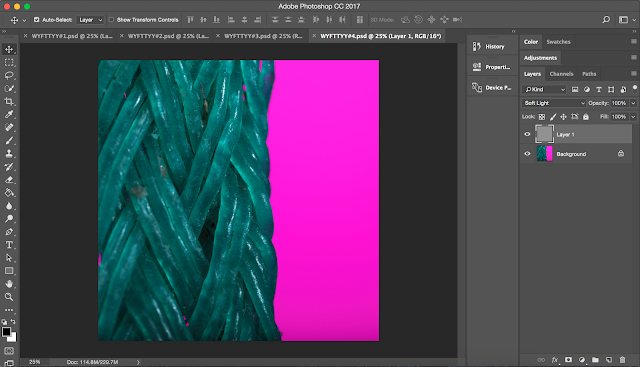
Preparing my final prints for module 523 (scale) After shooting my macro images for the assignment I then needed to prepare them for print.  The first thing I did was to add a sharpening recipe to whole image. Although the opacity of the sharpening mask is on 100% I was careful not to add too much sharpening. As you cant see from the image above it looks abit dull and off putting. The reason for the colour blance initially being off I think was due to the high amount of lighting I used to contend with the nature of the specialist macro lens. To make the green more accurate I negotiated each seperate colour channel until I had the correct tone of green. In changing the color channels I created unwanted areas of purple fringing in parts of the subject but this could not be corrected with the colour channels so I used a mix of the spot healing brush and the clone stamp tool to get rid of the worst areas. Next I created mock gallery images to see how my images would look

Cinematic editing in Lightroom

Image
Original image. Cinematic edit. To create the image above I used this video from Joe Jackson on Youtube as a reference... https://www.youtube.com/watch?v=bh0oOwtXChs Although editing is very much a personal preference there are a few key steps to creating this type of edit... 1) Choose a suitable scene (something with lights and water reflections works really well) and pick a good time of day to shoot (I personally like getting up and shooting in the morning 'blue hour'). 2) In Lightroom change the camera calibration colour profile from Adobe standard to Camera standard. This gives you the option to tweak the reds and blues more dramatically. 3) Change the white balance to tungsten and decrease the temperate. After these 3 steps are complete you are well on your way to creating a lovely cinematic edit...you can then fine tune the colours within the images and increase the clarity slightly to give the image more grit.

'Float between the books' - editing in photoshop

Image
In Aaron's lesson we were shown the importance of planning and thought when creating a composite image. We were then given the task of creating our own floating composite. Below are the steps I took to complete mine. Using a bench to lift me of the ground, one of the main components of this composite. The main two components of this composite are an image of me lying above the ground using a bench and also an image of the background with nothing else present. The key to a good image is the use of a tripod and more specifically not moving the camera positioning at all between the two shots. This means you do not have to align the two images because it is already done. The next step was to use Topaz Labs to remove the background including the bench from the image with me in it...adding this layer to photo of the empty room completes the basis of this image. Individual book images to be used as separate layers in Photoshop. My next step was to photograph the books th