Photoshop - Portrait retouch
This blog post demonstrates portrait retouching and is also included in my sketch book...
 Firstly, I calibrated my screen and ensured Photoshop was running in the correct colour settings of Adobe(1998).
The image was taken using a grey card so I adjusted the colours again slightly once the images were opened In the workspace.
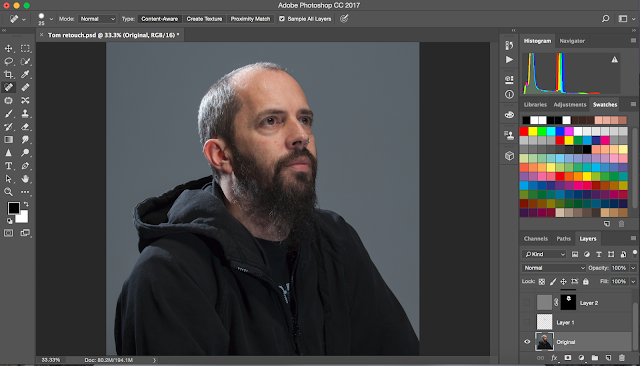
 I renamed the first image as ‘original’ and added a new blank layer to work in a non-destructive way.
With this new later set to sample all layers I retouched beard hairs, a spot on the cheek and a scar on the forehead along with some ageing lines.
This was done using a mixture of the spot healing brush tool and the healing brush tool.
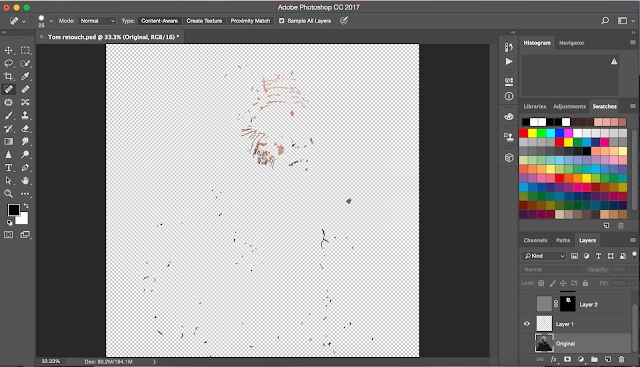
To keep working in a non-destructive way I had to duplicate the retouch layer whilst keeping the original underneath. To do this I pressed command – E to merge the retouch layer down, then command A to select all and command C to copy the image. Next, I clicked back to the last spot healing brush tool in the history and pressed command V to paste the retouched image in a layer above my separate retouching layers.
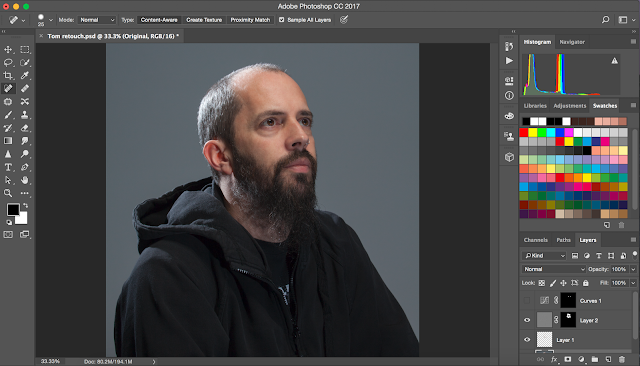
Next I inverted the top layer and added a high-pass filter and Gaussian blur. These layers then needed an inverted layer mask to allow me to be selective with the areas that are effected by the skin smoothing, as it doesn’t look too good when applied to the hair.
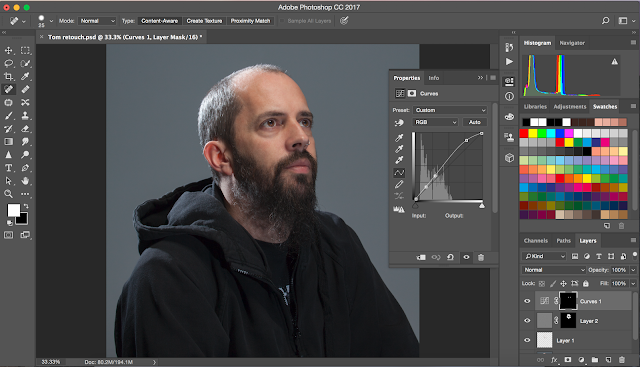 Finally, I added a quick
mask curves layer to whiten the eyes slightly, this along with the subtle skin
blur helps to give to final image a slick and polished result.
Finally, I added a quick
mask curves layer to whiten the eyes slightly, this along with the subtle skin
blur helps to give to final image a slick and polished result.
 |
| Before & After |
 Firstly, I calibrated my screen and ensured Photoshop was running in the correct colour settings of Adobe(1998).
The image was taken using a grey card so I adjusted the colours again slightly once the images were opened In the workspace.
 I renamed the first image as ‘original’ and added a new blank layer to work in a non-destructive way.
With this new later set to sample all layers I retouched beard hairs, a spot on the cheek and a scar on the forehead along with some ageing lines.
This was done using a mixture of the spot healing brush tool and the healing brush tool.
To keep working in a non-destructive way I had to duplicate the retouch layer whilst keeping the original underneath. To do this I pressed command – E to merge the retouch layer down, then command A to select all and command C to copy the image. Next, I clicked back to the last spot healing brush tool in the history and pressed command V to paste the retouched image in a layer above my separate retouching layers.

Next I inverted the top layer and added a high-pass filter and Gaussian blur. These layers then needed an inverted layer mask to allow me to be selective with the areas that are effected by the skin smoothing, as it doesn’t look too good when applied to the hair.
 Finally, I added a quick
mask curves layer to whiten the eyes slightly, this along with the subtle skin
blur helps to give to final image a slick and polished result.
Finally, I added a quick
mask curves layer to whiten the eyes slightly, this along with the subtle skin
blur helps to give to final image a slick and polished result.


Comments
Post a Comment