Posts

Topaz labs

Image
When visiting the awesome photography show at the NEC in Birmingham I left leaving one thing (other than a Hasselblad) which was Topaz labs...usually skeptical of overly polished sales demos this one had me hook line and sinker so I decided to purchase it a few days after. The complete bundle boast many creative and artistic features but I was particularly blown away by  'DeNoise 6' and 'ReMask 5'. Both claimed to improve quality and save time in doing the job, and both work seamlessly with Photoshop and Lightroom. I decided to create a blog to show both features in action using my own images. Firstly I deliberately took a shot at ISO3200, pushing the limits of what my 5D markII can cope with. The image was very noisy as you can see from the 1st example and the zoomed image taken from DeNoise 6. Sky shot at ISO3200. DeNoise 6 differs from other noise removal plug-ins because rather than delete pixels it intelligently  colours them back in meaning the quality of...
Working on location

Image
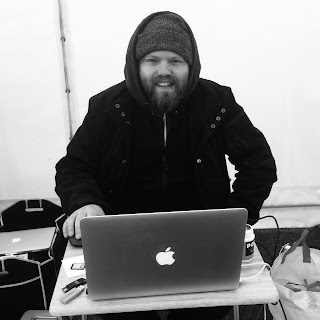
Over the easter period a notice came up on the College notice board requiring photographers and an editor for paid work. I am fairly handy with Lightroom and Photoshop but was a little hesitant as I've only worked for myself as photographer and was unsure what level of editing would be expected. I decided to give it a go and it turns out I was working for a level 5 student on my course. She had taken on the the massive task of doing team and individual player photos at a local football tournament (85+ teams). I generally see any experience as good experience especially as editing is an area I'm keen to improve going forward. The job required minimal editing in the form of minor exposure adjustments and cropping to the requirements of the print size. That being said it was still a difficult task. I had 4 photographers continuosly arriving with SD cards full of images, the task of editing the images then exporting them and also selecting and printing certain images. All...

Progression

Image
Original portrait I decided to do this particular blog for a number of reasons. The first being that I wanted to show use of the spatter grain feature in an artistic way(see final example), this feature is something we have just been taught about in class. Secondly I wanted to try something more advanced with my editing skills with a view to using the technique on my final assignment of the year. Portrait with first attempt at dispersion. To create this image I followed a short tutorial on Youtube and as a first attempt I don't think I've done too badly. It takes time and patience to create an image like this at a sophisticated and professional level...something I usually have, but in this instance I probably rushed a little with the excitement of learning a new skill. I wanted to blog about my first attempt so that I, as well as others can judge my progression once the final assignment is complete. In the meantime I am going to watch other tutorials on this effe...

Composite images

Image
In my first blog I spoke about Erik Johansson and his dreamlike creations using layers and masks in Photoshop. Using layers and masks doesn't always have to lead to the creation of a composite image on a grand scale, it can be done to correct or slightly alter an image.          A photography friend of mine was recently asked to take a family photograph (mother & 3 children) and digitally add a 4th child who couldn't be present on the day of the shoot.  In this instance, as a photographer we should be able to look past our moral compass and not overthink the truth (or lack of truth) in an image. In the example below I have created an image based on a similar idea to show how easy it can be to deceive people with composite images. The original image had the unfortunate sight of a dogs anus on show, not something you would like to present to a client after a pet photoshoot.  In a matter of minutes I had removed the second dog all together to...

Photoshop - Portrait retouch

Image
This blog post demonstrates portrait retouching and is also included in my sketch book... Before & After Firstly, I calibrated my screen and ensured Photoshop was running in the correct colour settings of Adobe(1998). The image was taken using a grey card so I adjusted the colours again slightly once the images were opened In the workspace. I renamed the first image as ‘original’ and added a new blank layer to work in a non-destructive way. With this new later set to sample all layers I retouched beard hairs, a spot on the cheek and a scar on the forehead along with some ageing lines. This was done using a mixture of the spot healing brush tool and the healing brush tool. To keep working in a non-destructive way I had to duplicate the retouch layer whilst keeping the original underneath. To do this I pressed command – E to merge the retouch layer down, then command A to select all and command C to copy the image. Next, I clicked back to the last spot hea...

Photoshop - Technical assessment No.1

Image
We were asked in class to work on an image in Photoshop using the techniques and practices we have been developing over the previous weeks. The image above has been  coloured  correctly, sharpened slightly and had blemishes removed. This was done using layers to remain nondestructive along with blend modes and filters. In hindsight, I think perhaps the white of the jumper is a little on the blue side but over all I’m happy with how it turned out and think its highlights what can be done in 5 minutes with Photoshop even for someone who is just starting with it.

Photoshop - The lens correction filter

Image
The examples above show the lens correction filter in Photoshop before and after the filter has been applied. I was inspired to look into this after a talk by Sean Conboy at the Blackpool & Fylde College. He uses high end digital medium format cameras with quality lenses, this allows him much more movement when composing an image. It allows him to correct the lines before he clicks the shutter and has much more versatility than a DSLR with the best tilt shift lens. As you can see Photoshop does a decent job of emulating the high-end cameras but it still isn’t quite there. It shows that for all the new technology we have, sometimes the more traditional methods work best. Whilst taking the shot above I used a 20 second shutter, at f/22 & ISO200, I took advantage of the long shutter and used a high-powered torch from a distance to add addition light to the building on the right and to the roof of the building on the left. I intend to reshoot the shot at an earli...