Posts

Imagining my images in a gallery

Image
Once I had my final images I began to think I about the way the series could be displayed, I decided to use my love for Photoshop to do something I had never done before and create some mock gallery exhibitions involving my own work. First I created mock ups of what the single images would look like in a gallery environment using royalty free images such as the example below. I then used a mixture of Topaz Labs and Photoshop to create a realistic interpretation of what my series would look like in a gallery. To create this I duplicated the main image then used a mask to separate the wall from the foreground of the image. I then placed my own images inside the existing frames in the shot. For my final gallery mock up I wanted the image to have more going on to convince the viewer they are seeing an actual image of my work in a gallery. I think the reflections off the marble floor helps to sell the illusion. In the future I hope to have my work exhibite...
Preparing my final prints

Image
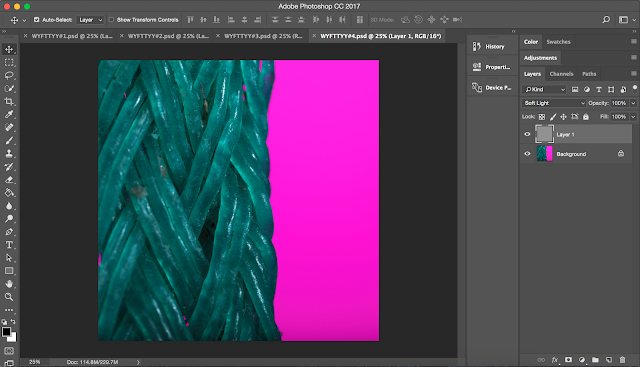
Preparing my final prints for module 523 (scale) After shooting my macro images for the assignment I then needed to prepare them for print.  The first thing I did was to add a sharpening recipe to whole image. Although the opacity of the sharpening mask is on 100% I was careful not to add too much sharpening. As you cant see from the image above it looks abit dull and off putting. The reason for the colour blance initially being off I think was due to the high amount of lighting I used to contend with the nature of the specialist macro lens. To make the green more accurate I negotiated each seperate colour channel until I had the correct tone of green. In changing the color channels I created unwanted areas of purple fringing in parts of the subject but this could not be corrected with the colour channels so I used a mix of the spot healing brush and the clone stamp tool to get rid of the worst areas. Next I created mock gallery images to see how my images would l...

Cinematic editing in Lightroom

Image
Original image. Cinematic edit. To create the image above I used this video from Joe Jackson on Youtube as a reference... https://www.youtube.com/watch?v=bh0oOwtXChs Although editing is very much a personal preference there are a few key steps to creating this type of edit... 1) Choose a suitable scene (something with lights and water reflections works really well) and pick a good time of day to shoot (I personally like getting up and shooting in the morning 'blue hour'). 2) In Lightroom change the camera calibration colour profile from Adobe standard to Camera standard. This gives you the option to tweak the reds and blues more dramatically. 3) Change the white balance to tungsten and decrease the temperate. After these 3 steps are complete you are well on your way to creating a lovely cinematic edit...you can then fine tune the colours within the images and increase the clarity slightly to give the image more grit.

'Float between the books' - editing in photoshop

Image
In Aaron's lesson we were shown the importance of planning and thought when creating a composite image. We were then given the task of creating our own floating composite. Below are the steps I took to complete mine. Using a bench to lift me of the ground, one of the main components of this composite. The main two components of this composite are an image of me lying above the ground using a bench and also an image of the background with nothing else present. The key to a good image is the use of a tripod and more specifically not moving the camera positioning at all between the two shots. This means you do not have to align the two images because it is already done. The next step was to use Topaz Labs to remove the background including the bench from the image with me in it...adding this layer to photo of the empty room completes the basis of this image. Individual book images to be used as separate layers in Photoshop. My next step was to photograph the books th...

Editing astro photography...

Image
After watching an inspiring talk on the benefits of landscape & nature photography by Thomas Heaton, Tom Walsh & I headed to Beacon Fell just before sunset to attempt some astrophotography. Technology has made this type of photography much more efficient, with augmented reality apps allowing you to know exactly where the milky way and other star formations are within seconds. This technology also handed us the knowledge that the Milky Way isn't perfectly visible at this time of year and won't be until around February. This didn't deter us from practising our skills ready for when we have prime conditions. I only got one decent shot from the whole night but I could see a nice glimpse of the Milky Way (decent enough for a first attempt) on the back of my display. A lot of astro photo images are edited in some way so I decided to blog about the quick edit I did. The original images as uploaded into Lightroom. Firstly, due to the white balance being on wh...

Focus Stacking

Image
In the lesson on focus stacking we were given a set of images of a peg.  To make the peg look as sharp and crisp as possible when enlarged as part of a composite the peg is photographed at different focus points then stacked using an automatic feature within Photoshop. We then placed the peg into another image and created a our own drop shadow (see image below). I think I did a decent job of this other in hindsight I would probably make the opacity of the shadow slightly less and feather its edges some more. I had already considered using focus stacking in my project on scale but this lesson inspired me even more to do so. Also, I have a high powered macro lens that I haven't used properly in the couple of years that I've had it, so I decided now would be a good time to learn. / My first attempt consisted of approximately 13 images. As you can see from the highlighted area above Photoshop struggled to blend the images without big blurred areas. The problem with such a h...

Year 2 (level 5) - Photoshop restoration

Image
Over the summer break I was asked to do some restorations for a family friend, I made the mistake with this one of getting way too involved for the price that I had quoted. Once I had started I saw it as a challenge to see how much I could push myself with Photoshop and I’m glad that I did as the end result is something I’m really proud of. As a rule I usually work in a non-destructive way in Photoshop but for some reason had never done this for restorations. Previous attempts have always been no more than a few layers, with only minor scratches and blemishes. Before starting the task I watched a video on Youtube about restorations where the tutor broke the whole process down into sections that could easily be erased or adjusted later on because each section of the image was edited on separate layers. I decided to use this method myself as it seems very logistical. 1 - This is the image as it was scanned in, using a mediocre scanner from a photograph that was roughly 4...